
Step-by-Step: Adding Shared Storage to a Kubernetes Cluster
Step-by-Step: Adding Shared Storage to a Kubernetes Cluster
Today I’m going to show you how to expand the capabilities of a Kubernetes cluster by adding shared storage

Hey there and welcome back. I hope you’re having an excellent day.
Today I’m going to show you how to expand the capabilities of a Kubernetes cluster by adding shared storage. For the demo, I’ll be upgrading my home cluster by connecting a Synology NAS as an NFS server that can serve read-write-many persistent volumes.
But before I get into the demo, it’s probably a good idea to explain why you would want to do this and the downsides of sticking with the default storage that comes with a Kubernetes cluster.
A Little Bit About Kubernetes Storage
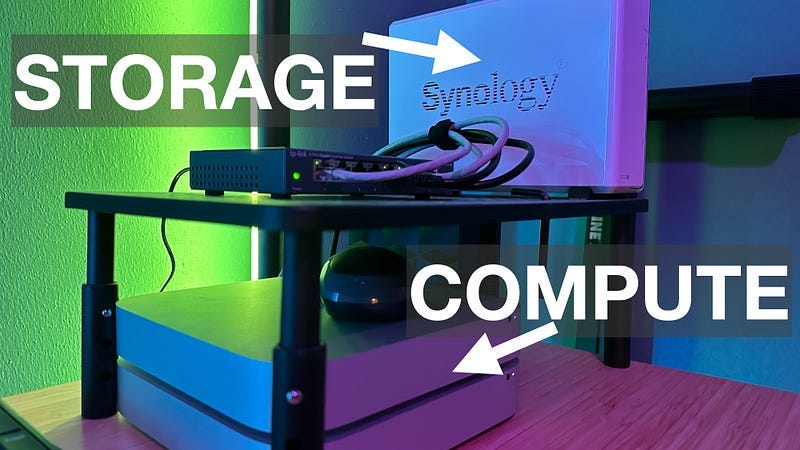
In the last article I released, we set up a two-node Kubernetes cluster using two Mac Minis. But no matter if this is just a small home setup or a full-scale enterprise compute cluster, Kubernetes running on nodes such as these are really designed to provide only compute resources.

And When I say compute resources, what I mean is essentially the logic needed to do the computational task at hand. Whether that be a web server, a database, background processes, or whatever you can dream up, it's really only designed to handle crunching the numbers and not much else. Since Kubernetes is running docker containers, compute resources on a Kubernetes cluster are designed to be started, stopped, and shuffled around at will.
This means that if your compute workload needs to store things on a disk for anything other than temporary usage, it’ll need someplace else to store that data.
On Kubernetes, that means declaring persistent volumes in the definition of your app. So When your workload starts up, it looks to mount a disk of some sort for storing things.
Then, if the workload restarts or gets moved around it can just re-attach to the same storage volume and continue right where the last one left off.

The Issues with HostPath Storage
The issue though, that we start to run into immediately is the location and the availability of those requested storage volumes. As I mentioned a minute ago, if you have a single node Kubernetes cluster running, you can just create your volumes on the same machine that’s running Kubernetes. This is called a “host path” volume.
In the case of a single node cluster, everything is simple. You know that if a workload restarts, it’s guaranteed to start on your single node. When it starts it will be able to find the volume because it’s on that same machine.
When you move to two or more nodes you almost immediately will have issues with these simple host-based volumes. Let’s use my little cluster here for an example.
Let’s say I have a workload on node one, and it has a host path volume attached. At this point, everything works just fine.

But, what if node one becomes overwhelmed and this workload needs to be moved to node 2? Now, all of a sudden you have a workload on node 2 that is looking for a volume that only exists on node 1. In this case, it won’t be able to start up because the volume isn’t available.

A similar, but slightly different problem occurs if we need to have two instances of this workload running. In the case of scaling a workload, Kubernetes will try to start one instance of the workload on each node and this actually makes two different problems.
First, you have the same unavailable volume issue as the first example, but even if you did somehow make this disk available to both workloads, the second issue is that host path volumes are what’s called “read write once”. In Kubernetes lingo, this means that while two workloads can mount this volume, only one of them has permission to write to it. So that’s a different problem altogether

Gary M - Medium
Read writing from Gary M on Medium. Lead developer, systems architect, and lifetime learner. Every day, Gary M and…medium.com
NFS To The Rescue!
Luckily there’s a pretty easy way to solve all of this. It’s called the Kubernetes NFS provisioner (or NFS container storage interface). NFS servers have been around for forever and have provided a simple way for multiple workloads to connect to one disk. It even allows both workloads to read and write simultaneously. The NFS CSI allows a multi-node Kubernetes cluster to create and mount volumes that are backed by NFS. Installing and configuring the CSI is a one-time thing and after that, it’s completely transparent to the user of the cluster.
So let’s get into the steps and ill show you how to set up a Kubernetes cluster to use NFS for provisioning volumes.
The very first thing we need to do is have an NFS server. There are a bunch of ways to do this, and I’m going to quickly show you two of them.
Adding NFS to One of Your Nodes (not recommended)
The first is by adding NFS to one of your Kubernetes nodes. While this method will solve all the issues I listed earlier, it’s not really the preferred way of doing this if you are being really pedantic about it. Since it's installing NFS on the node, it’s not really separating concerns between compute and storage. For example, if the node with NFS went down, the other node would obviously not be able to mount the volumes it needs.


Installing NFS on one of your nodes is actually pretty easy, and the instructions are on the microk8s website. You can ssh into the server and then just copy and paste the commands provided here. Once it’s done installing, you’re all set.

Adding a Separate NAS for NFS
The second method, which is the more preferred and technically correct way to do it, is to have a completely different device for running NFS. In my case, I’ve had this Synology DS120 for a couple of years, and I’ve historically used it as a target for time machine backups. It has plenty of space available, so I’m going to enable NFS on it.

Very quickly, enabling NFS on the Synology NAS (or any NAS) is pretty straightforward. If you already have one or plan on buying one here’s how to do it. If not, feel free to skip to the next part.
First, log into the NAS manager.
Next, create a shared folder on an available disk.

Next, open the properties on the folder and set up NFS permissions. Since this is a home server with no outside access I’ve made the permissions super simple. It essentially allows any IP in my home network to connect and squashes all the users to root.

Next back from the control panel open up file services, go to the NFS tab, and check the box to enable NFS. Save all that and you are all set.

Installing the Kubernetes NFS Provisioner
Ok now that we have an NFS server available, we need to install the NFS CSI driver on the Kubernetes cluster. One thing to note here is that Kubernetes supports a bunch of different storage interfaces. In our case today we’re installing the NFS storage interface.
Back on the microk8s site, click on the link to step two. As you can see this gives instructions to install this using a helm chart. Even something like this is just another workload installed on the cluster which makes it all super relatable.

Ssh into your cluster and run the four commands to install the NFS CSI driver and wait for it to finish. Once it’s done, you’re all set with any installation stuff.

Creating a Kubernetes StorageClass
Alright, so now that we have this installed let's go over how to use it.
The first thing we need to do is make what is called a storage class. In Kubernetes, these are essentially a set of instructions for how the system will go about provisioning a volume when you ask for one. In our case, we’re going to create a storage class called “nfs-csi”. And just FYI this is just a name I made up. You can call it whatever you want.

On the very next line down you’ll see the provisioner. This is where you are telling Kubernetes that any time you request a volume using this storage class, it should attempt to get the volume from the NFS provisioner that we just installed earlier.

Finally, the storage class parameters tell Kubernetes how to provision the volume you requested. In our case, we provide the NFS server’s IP address and the name of the share. All of this information should be available to you from the previous steps.

The rest of this stuff you can set exactly as I have them set on the screen, but one item you may want to change is the reclaim policy. If you set this to “retain” instead of “delete”, Kubernetes will never delete the underlying data in the NFS server when you delete a volume on the cluster. If you have critical data on your cluster, that might be a good idea. Or, you could make a second storage class, (one that retains and one that deletes). Then you can choose based on your needs at the time.

So let's just recap what we did here because it's super important. This storage class object is essentially a set of instructions for Kubernetes. It’s telling the system that you have a class of storage called “nfs-csi” and when a user of this cluster requests a volume by this storage class name, it should send the request to the NFS CSI provisioner along with the IP and the path of the NFS server. The NFS CSI will then reach out to your NFS server and create a space on the NFS server for the storage you requested. Behind the scenes, it’s just a folder on the NFS server, but to your workloads, it looks like a new shared persistent volume.
So now save that file then install it on your cluster with Kubectl using the command kubectl apply -f THE FILE NAME
Using Your New Storage Class With a Persistent Volume Claim
Now, finally, we’re ready to actually use these things. Just to test it out go ahead and make a persistent volume claim. Under the spec section set the accessModes to ReadWriteMany and the storageClassName to nfs-csi (or whatever you named your storage class earlier). As I mentioned just a second ago, by putting the storage class name on this persistent volume claim, you are telling Kubernetes to go and provision this volume using the NFS CSI with the instructions you put in the storage class object.

Install the persistent volume claim the same way as the storage class with kubectl apply -f THE FILE NAME after a few minutes Kubernetes should show that the PVC is bound. That means it worked.

Using your Persistent Volume Claim
Now if you want to use this shared PVC as a volume in a deployment, just add it to your deployment in the volumes section. Specify the type of volume as persistentVolumeClaim and then provide the claim name just like you would any other.

Ok, now you have a pretty close replica of a Kubernetes cluster you would see in a production environment. Storage is separated from compute and all is right in the world.
I truly appreciate you reading all the way to the end. Thank you. And until next time, happy coding!